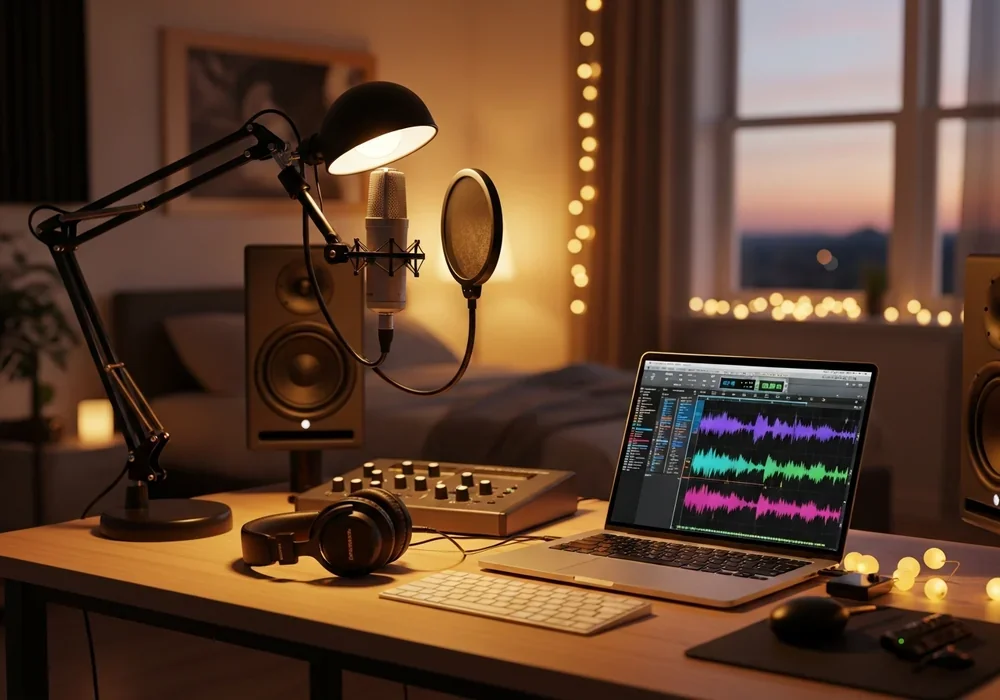
The Magic of Small Spaces: Why You Don’t Need a Commercial Studio
Have you ever sat in your room, humming a melody, and wished you could capture that moment with professional clarity? Many aspiring creators hesitate because they believe a ‘real’ studio requires thousands of dollars and a soundproofed basement. Honestly, that couldn’t be further from the truth. In the modern era, home recording equipment has become so sophisticated that some of your favorite Billboard hits were likely finished in a bedroom just like yours.
The beauty of a compact home setup lies in its intimacy. You don’t have to worry about hourly rates or the pressure of a sterile studio environment. Here, you are the producer, the engineer, and the artist. All you need is a thoughtful selection of tools that prioritize quality over quantity. Small spaces actually offer a unique sonic character that, when managed correctly, adds a personal touch to your music that big studios often struggle to replicate.
The ‘Gear Trap’ Every Beginner Falls Into and How to Avoid It
It’s incredibly tempting to browse endless catalogs and think, “If I just had that $2,000 Neumann microphone, my songs would sound perfect.” This is the ultimate trap. I’ve seen countless beginners spend their entire budget on one high-end piece of home recording equipment, only to realize they have no money left for cables, stands, or even a decent pair of headphones. A chain is only as strong as its weakest link.
Instead of chasing ‘prestige’ brands, focus on balance. A $100 mic in a well-treated room will always sound better than a $1,000 mic in a room with a buzzing refrigerator and echoes. Start with the essentials: an interface, a microphone, and monitoring gear. Everything else is a luxury you can add later. Remember, the goal is to get your ideas down as quickly and clearly as possible. Don’t let the lack of ‘pro’ gear be your excuse for not creating.
The Heart of Your Sound: Choosing an Audio Interface That Looks as Good as It Performs
Think of the audio interface as the translator between your musical world and your computer’s digital brain. It’s the heart of your home recording equipment. For those who care about ‘deskterior’—the aesthetic harmony of their workspace—the choice of interface is crucial. You want something that provides clean preamps but also complements your desk’s visual vibe.
The Focusrite Scarlett series is a classic for a reason. Its iconic brushed red aluminum casing adds a pop of sophisticated color to any setup. If you prefer a more rugged, industrial look, the PreSonus AudioBox or the Arturia MiniFuse offer sleek designs with incredible durability. These devices provide the phantom power your microphones need while ensuring your latency stays low enough that you won’t even notice a delay when you play. It’s about finding that sweet spot where technical specs meet beautiful industrial design.
Capturing the Soul: Condenser Microphones That Punched Above Their Weight
When it comes to vocals and acoustic instruments, a condenser microphone is your best friend. It captures the ‘air’ and the subtle textures that dynamic mics often miss. However, the market is flooded with options. How do you choose? I always tell my readers to look for versatility. You want a mic that can handle a delicate vocal one day and a bright acoustic guitar the next.
The Audio-Technica AT2020 is the undisputed king of entry-level home recording equipment. It’s sleek, black, and incredibly honest in its sound reproduction. If you want something with a bit more ‘weight’ and a classic studio feel, the AKG P120 offers a sturdy metal body and a very clean response. These microphones don’t just record sound; they capture the emotion of the performance. Pair them with a simple pop filter, and you’re suddenly producing radio-ready tracks in your pajamas.
Hearing the Truth: Why Your Consumer Earbuds are Ruining Your Mix
Here is a hard truth: those expensive noise-canceling headphones you use for commuting are terrible for recording. They are designed to make music sound ‘better’ by boosting bass and smoothing out highs. In a studio, you don’t want ‘better’—you want ‘truth.’ You need to hear the flaws so you can fix them. This is where professional monitoring headphones come into play.
The Sony MDR-7506 has been the industry standard for decades. They aren’t the prettiest, but they are incredibly accurate and fold up for easy storage. For those who prioritize comfort during long sessions, the Sennheiser HD280 Pro offers amazing isolation, keeping the click track from leaking into your microphone. Investing in proper monitoring is the single fastest way to improve your mixing skills. When you hear the truth, you make better musical decisions.
Three Budget Blueprints: From $300 Essentials to $1,000 Pro-Entry Sets
Budgeting is often the most stressful part of picking out home recording equipment. To make it easier, I’ve broken down three tiers that balance performance with price. Each of these sets is designed to be cohesive, ensuring that no single component bottlenecks your creativity.
| Budget Tier | Primary Use Case | Recommended Key Gear | Estimated Price |
|---|---|---|---|
| $300 Minimalist | Podcasting, Voiceover, Simple Vocals | Focusrite Solo + AT2020 + Samson SR850 | $280 – $310 |
| $500 Balanced | Songwriting, Indie Pop, Acoustic Music | Scarlett 2i2 + AKG P120 + Sony MDR-7506 | $450 – $520 |
| $1,000 Premium Entry | Full Music Production & Mixing | Audient iD14 + Rode NT1 + Yamaha HS5 Monitors | $950 – $1,050 |
Notice how even the $300 set includes high-quality names. You don’t have to buy ‘no-name’ gear just to save a few dollars. It’s better to have a high-quality 1-channel setup than a low-quality 4-channel setup you’ll want to replace in three months.
The Art of Deskterior: Merging Functionality with Aesthetic Workspace Design
At DesignHomes, we believe your environment dictates your output. If your desk is a mess of tangled cables and bulky stands, your creative energy will drain away. The goal is to integrate your home recording equipment into a ‘deskterior’ that inspires you. Start with a clean, wide desk—minimalist wood or matte white works best as a canvas.
Use a boom arm for your microphone instead of a traditional tripod. This clears up desk space and allows you to swing the mic away when you’re just browsing the web. Position your audio interface within arm’s reach but tucked slightly to the side to keep the center of your desk clear for a MIDI keyboard or your notebook. A tidy space leads to a tidy mix, and frankly, it looks much better on your Instagram feed.
Taming the Room: Pro-Level Acoustics Without the Construction Bill
One of the biggest secrets in the industry is that the room matters more than the gear. But don’t worry, you don’t need to glue ugly egg cartons to your walls (please, don’t do that—they don’t work!). You can achieve great acoustic results using items you already own. A thick rug on the floor kills floor-to-ceiling reflections, and a bookshelf filled with books acts as a natural diffuser for sound waves.
If you have a bit of a budget, focus on ‘bass traps’ for the corners of your room. Low frequencies tend to gather there and make your recordings sound ‘muddy.’ If you’re recording vocals, a reflection filter that attaches to your mic stand can mimic the sound of a vocal booth for a fraction of the cost. Even heavy velvet curtains can transform a ‘ringy’ room into a lush, dry recording space. It’s about managing the air around the microphone.
The Digital Canvas: Best Free DAW Programs to Start Your Journey
Your Digital Audio Workstation (DAW) is where the magic happens. Many people think they need to drop $500 on Pro Tools or Ableton Live immediately. Stop! There are incredible free options that offer 90% of the same features. If you’re on a Mac, GarageBand is already sitting there, and it’s surprisingly powerful. It’s essentially a streamlined version of Logic Pro.
For Windows users, Cakewalk by BandLab is a fully professional DAW that used to cost hundreds of dollars but is now free. If you want something more experimental and lightweight, Reaper offers a generous ‘never-ending’ trial and is incredibly efficient on older laptops. These programs allow you to record, edit, and mix your tracks without spending a dime on software. Save that money for better home recording equipment hardware instead.
Future-Proofing Your Setup: The Smart Upgrade Path
Eventually, you’ll want to grow. But don’t upgrade everything at once. The smartest path is to upgrade your ‘ears’ first. Get better headphones or studio monitors so you can actually hear the limitations of your current gear. Next, look at your interface. As you start recording more instruments, you’ll need more inputs.
The last thing you should usually upgrade is your microphone. Why? Because a great mic reveals the flaws in everything else. Wait until you have a treated room and a high-quality interface before buying that ‘dream’ microphone. By following this logical progression, you ensure that every dollar spent results in a noticeable jump in your production quality. Your home studio is a living, breathing space—let it evolve naturally alongside your skills.
Key Takeaways for Your Home Studio
- Prioritize Balance: Don’t spend all your money on one item; ensure your interface, mic, and headphones are of similar quality.
- Room Over Gear: Use rugs, curtains, and bookshelves to treat your space before buying expensive hardware.
- Aesthetic Matters: A clean, well-organized ‘deskterior’ keeps you inspired and productive.
Setting up your first studio is a journey of self-expression. By choosing the right home recording equipment, you’re not just buying tools; you’re building a gateway for your creativity to reach the world. Start small, stay organized, and most importantly, start recording today!
자주 묻는 질문
Can I record professional vocals with a USB microphone?
Yes, you can! Mics like the Blue Yeti or Audio-Technica AT2020USB+ are great for beginners. However, an XLR microphone with an audio interface offers better long-term flexibility and sound quality as you grow.
Do I really need a pop filter?
Absolutely. A pop filter prevents ‘plosives’ (harsh ‘P’ and ‘B’ sounds) from overloading the microphone’s capsule. It’s a very cheap accessory that makes a massive difference in vocal clarity.
What is the most important piece of equipment for a beginner?
The audio interface. It dictates the quality of your recording and how well you can hear your playback. A reliable interface like the Focusrite Scarlett is the foundation of any good home studio.

Kumar Tomar is a distinguished writer at DesignHomes.in, specializing in home design and interior decor. Holding a degree in Interior Design from the National Institute of Design, Kumar combines formal education with practical experience to deliver insightful and authoritative content. With over 8 years in the industry, he is known for his in-depth knowledge of design trends and his ability to provide actionable advice for homeowners. Kumar’s expertise and dedication to high-quality writing make him a trusted resource for those seeking to enhance their living spaces. Follow Kumar on Instagram for the latest design inspiration and tips.